Project 1: Introduction and Bootloading
Due: Tuesday, October 2, 11:59:59 p.m.
Table of Contents:
Intermediate Deadline: Before class, Wed, Sept 26, you should be able to execute bochs and display one character in the upper left corner.
Objective
This project will familiarize you with the boot process and also with the tools and the emulator that you will use in subsequent projects. The end product for this project will be (1) a very small kernel that will print out "Hello World" to the screen and hang up (i.e., enter an infinite loop) and (2) a shell script for creating & running a bootable disk image containing that kernel.
Background
When a computer is turned on, it goes through a process known as booting. The computer starts executing a small program, known as the bootstrap program, which is contained in the BIOS (basic input/output system), which comes with the computer and is stored in ROM. The BIOS bootstrap program reads the first sector of the boot disk and loads it into memory. The first sector of the boot disk will contain a small program called the bootloader. After loading the bootloader into memory, the BIOS performs a jump to the address where it placed the bootloader, which starts the bootloader program executing. When executed, the bootloader loads and executes the operating system kernel--a larger program that comprises the bulk of the operating system.
Tools
You will use the following tools to complete this and subsequent projects:
bochs&bochs-x- An x86 processor emulator with X GUI (pronounced box)bcc(Bruce Evan's C Compiler) - A 16-bit C compileras86andld86- A 16-bit 0x86 assembler and linkergcc/g++- The standard 32-bit GNU C compilernasm- The Netwide Assemblerhexedit/hexdump- Utilities that allows you to edit/view a file in hexadecimal byte-by-bytedd- A standard low-level copying utility. A simple text-based editor of your choice (e.g., atom, jedit, gedit, vim, xemacs)
All of these tools are available for free for Mac and Linux (but not for Windows). They may already be installed (or part of the project). If not, you are welcome to download and install them on your own Mac/Linux machines. However, I cannot provide any significant support for the download and installation of the tools on your personal machines.
Step 0. Set up
You can develop either on a lab machine or on your own machine using a VM.
We have created a VM image with everything set up and ready to go. VirtualBox is recommended for running the virtual machine. It is already installed if you're using a lab machine. If you are asked to upgrade ubuntu, say no.
What is a Virtual Machine?
A virtual machine has all the same capabilities as a desktop or laptop computer, but runs virtually inside another host operating system. For example, I have a Mac laptop that can run Ubuntu or Windows inside a virtual machine. This is a way to run multiple OSes on the same machine without the hassle of dual-booting. The downside is in performance: now your computer has to run two operating systems at the same time! If you find your VM is too slow, adjust the settings for memory and video memory. If your host machine is becoming too slow, be sure to close the VM when you're not working to free up resources.Our VM
If you're on your own machine, Download the
VM. If you're on the lab machines , you need to use one of
the machines in the advanced lab and use
/csdept/courses/cs330/handouts/csci330.ova Import the
appliance into VirtualBox. If you're having issues with Windows,
check
out this page.
A screenshot of the VM running is on the right. We're running
Ubuntu 18. The username is wluos, the password
is OS@wlu. (Having the username and password does not
get you any special privileges on the Linux lab machines.)
A number of text editors are available: emacs, vim, jedit, and atom. Figure out your favorite. (atom seems slow to start but then is okay.)
Want to install something not in the VM image? Use the sudo apt install command or Ubuntu's software manager (in the dock).
Using Git
We will use GitHub Classroom to distribute starter code for
Project1. Get comfortable with git on
the command
line, since we won't be using an
IDE. Learn Git
Branching may help -- you probably just need Main:
Introduction Sequence and Remote: Push & Pull -- Git
Remotes
Git is a powerful tool, and there is a lot that you can do. However, since you are using this repository just to share code between you and me, you should be able to focus just on a simple typical workflow and be fine.
You will need to create a GitHub account if you don't already have one. (This should be a free account because it's for education use.)
Set up to use git in the VM
Set up git to know who you are by running the commands
below. (Update the information in the commands.)
git config --global user.email "you@example.com"
git config --global user.name "Your Name"
By default, atom is used as the editor for git
commits. If you want to change the editor that is used for git,
see these examples.
Cloning the git project
Go to GitHub Classroom to get to the assignment and create your own repository.
Copy your repository name.
In your VM, in a terminal window, run the command:
git clone <your repository URL>
If you like the atom text editor, it has
built-in git
integration
Step 1. Getting Started with the Project
In the project1_username directory, you will find the following
files:
bootload.asm- assembly code for the boot loader.kernel.asm- assembly language routines you will use in your kernel.kernel.c- a simple kernel that displays a white A in the upper left-hand corneropsys.bxrc- bochs configuration file.test.img- bootable 1.44MB floppy image for testing bochs.
Booting bochs
In a terminal window,
- Change into your
project1directory - Copy
test.imginto a file calledfloppya.img - Type the command: bochs -f opsys.bxrc -q
This command will run bochs using the opsys.bxrc
configuration file. The configuration file tells bochs information
like what drives, peripherals, video, and memory the simulated
computer has. It also tells bochs where to boot from, in this case
from the file floppya.img. The floppya.img
file is a 1.4MB floppy disk image, which is a file that contains
exactly the number of bytes that can be stored on a 1.4MB floppy
disk. This particular image contains the assembled boot loader and a
small kernel that simply prints out "Bochs works!".
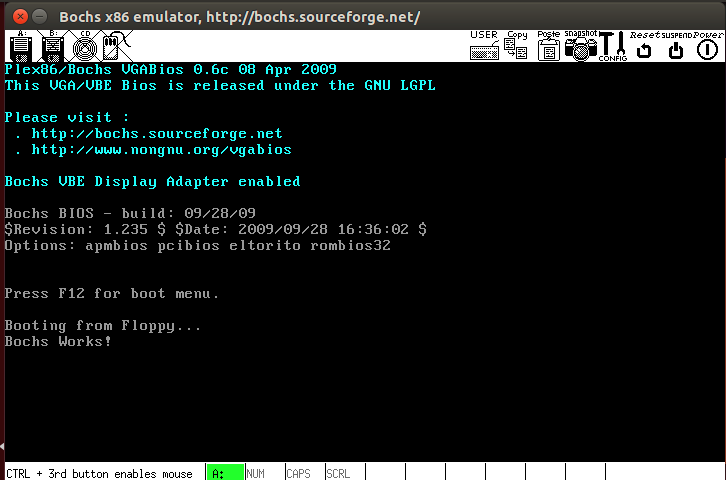
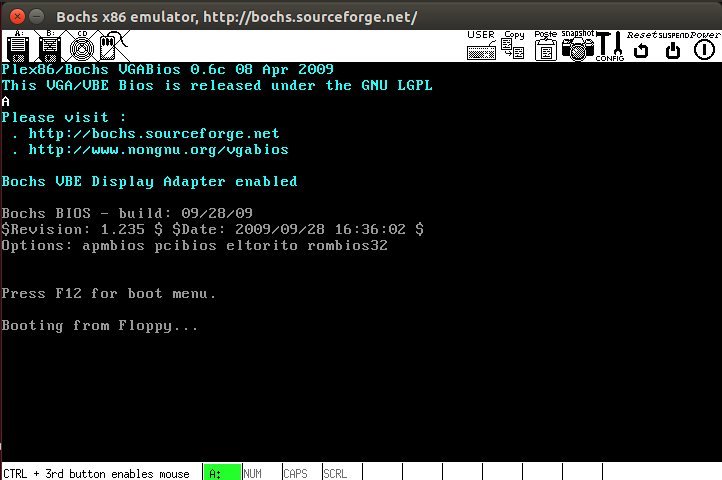
If all goes according to plan, when bochs boots
from floppya.img, the bootloader will load and execute
this small kernel, and you will see the message "Bochs works!"
appear in the bochs window. If you do not see the expected results
repeat the above steps, double-checking your work.
Stop the emulator by pressing the power button.
The Bootloader
We will be booting bochs from a 1.44MB floppy disk image. A 1.4MB
floppy disk has 2880 sectors of 512 bytes. Thus, the bootloader is
required to be exactly 512 bytes long (one sector) and be loaded into
sector 0 of the boot disk image. In addition, the last two bytes of
sector 0 must be 0x55 followed by 0xAA,
which indicates to the BIOS that the disk is a boot disk. Since not
much can be done with a 510 byte program, the purpose of the
bootloader is to load the larger operating system from the disk to
memory and start it running.
Since a bootloader has to be very small and handle such operations
as setting up registers, it does not make sense to write it in any
language other than assembly. Consequently, you are not required to
write a bootloader in this project; one is supplied to you in the file
bootload.asm. You will, however, need to assemble it and
install it into sector 0 of your boot disk image.
I encourage you to open the bootload.asm file in a
text editor and study its contents. It is a very small program that
does three things:
- The bootloader sets up the segment registers and the stack to
memory address
0x10000. This is where it puts the kernel in memory - It reads 10 sectors (5120 bytes) from the disk starting at
sector 3 and puts them at address
0x10000. This would be fairly complicated if it had to talk to the disk driver directly, but fortunately the BIOS already has a disk read function. The disk read function is accessed by putting the parameters into various registers and calling Interrupt 13 (hex). After the interrupt, the program at sectors 3-12 is now in memory at address0x10000. - It jumps to
0x10000, starting whatever program it just placed there. In this project that program will be a small kernel that prints "Hello World." In future projects, it will be your actual OS kernel.Notice that, after the jump, it fills out the remaining bytes with 0, and then sets the last two bytes to
0x55followed by0xAA, telling the computer that this is a valid bootloader.NOTE: the assembly code contains the number
0xAA55. The Intel architecture stores data in little endian form, i.e., the least significant bytes are stored at lower addresses, which means the hex digits will be stored from right to left as we go from lower addresses to higher addresses.
Assembling the Bootloader
To install the bootloader, you first have to assemble it. The bootloader is written in x86 assembly language understandable by the nasm assembler. To assemble it, use the command:
nasm bootload.asm
The nasm assembler generates the output file bootload,
which contains the actual machine language program that is
understandable by the computer.
You can look at the bootload file with the hexdump
utility. (Alternatively, you could run hexdump with
the -x option, which will display in two-byte
hexadecimal.) You will see a few lines of numbers, which are the
machine language instructions in hexadecimal. Below that you will see
a lot of 00s. Near the end, you will see the magic number 55
AA indicating that it is a boot sector.
Disk Images
We will use the unix dd utility to create disk
images. The first thing we'll do is create a disk image filled with
all 0's. To do this, use the command:
dd if=/dev/zero of=floppya.img bs=512 count=2880
The above command will copy count=2880 sectors
of bs=512 bytes/sector from the input
file if=/dev/zero and put it in the output
file of=floppya.img. 2880 is the number of sectors on a
1.4MB 3.5" floppy, and /dev/zero is a Unix special file
that contains only zeros. You should end up with a 1.4 MB file
named floppya.img that is filled with zeros.
We will also use the dd utility to copy
the bootload program to sector 0 of
the floppya.img disk image. To do this, use the command:
dd if=bootload of=floppya.img bs=512 count=1 conv=notrunc seek=0
The additional parameters to dd indicate that we
move seek=0 sectors before writing and that we do not
truncate the image after writing (conv=notrunc). If you
look at floppya.img now with hexdump, the
contents of bootload are contained in the first 512 bytes
of
floppya.img and the rest of the file is filled with 0's.
If you want, you can try booting bochs
using floppya.img. However, nothing meaningful will
happen because the bootloader in sector 0 will just load sectors 3-10,
which contain all 0's, and then attempt to run them.
In the next part of the assignment, you'll write your "Hello World"
program and put it into sector 3 of floppya.img so that
it runs when bochs is booted.
Step 2. A Hello World Kernel
For this project, the kernel should contain a main
function that simply prints out “Hello” in white letters on a
black background at the top left corner of the screen and then enters
an infinite while loop. You will write your program in C and save its
source code in a file named kernel.c.
When writing C programs for an existing operating system such as
Mac OS, Linux or Windows, you can use functions such as printf or
putchar that display text on the screen (similar
to System.out.println in Java). When these functions are
compiled, they use a system call to the operating system,
which ultimately handles the display of the characters. But, since we
don't have an OS yet (you haven't written it!), we can't have system
calls. Thus, there is no way to compile calls to functions such as
printf and putchar that rely on system calls
for their operation.
Since you cannot use the printf
or putchar functions, you will have to write the
characters you want to display directly to video memory. Video memory
starts at memory address 0xB8000. Every byte of video
memory refers to the location of a character on the screen.
In text mode, the screen is organized as 25 lines with 80 characters
per line. Each character takes up two bytes of video memory:
- the first byte is the ASCII code for the character
- the second byte tells what color to use to draw the character
The memory is organized line-by-line.
Thus, to draw a white letter 'A' on a black background at the beginning of the third line down, you would do the following:
- Compute the address relative to the beginning of video memory:
Since one line is 80 characters long, the beginning of the third line down would be 80*(3-1) = 160
- Multiply that relative location by 2 bytes per character: 160*2 = 320
- Convert that to hexadecimal (e.g., using
a converter): 320 = 0x140
Note: your implementation will not literally have to do this.
- Add that to the starting address of video memory
(
0xB8000) to get the memory address:0xB8000+0x140=0xB8140 - Write
0x41, the ASCII code for the letter `A', to address0xB8140.ASCII: 65, binary:
0100 0001, hex:0x41 - Write the color white (
0x0F) to address0xB8141
See the A on the third line, on the left, in the image at right?
The 16-bit C compiler that we are using provides no built-in mechanism for writing bytes directly to memory. To allow you to write bytes to memory from your kernel, you are provided with an assembly file kernel.asm that contains the function putInMemory with the following signature:
void putInMemory(int segment, int offset, char b)
segment- the most significant hex digit of the address times0x1000.offset- The four least significant hex digits of the address.b- the ASCII code of the character to be written.
For example, to write the character 'A' to
address 0xB8140, you could call:
putInMemory(0xB000, 0x8140, 65);
Fortunately, you will not need to translate characters to ASCII
manually. In C, a character is equivalent to its ASCII value. Thus,
the above line can be written as:
putInMemory(0xB000, 0x8140, 'A')
Alternatively, you can let C do the hex conversion for you, e.g.,
putInMemory(0xB000, 0x8000 + 320, 'A')
You should now be able to write a kernel that prints out "Hello" at the top left corner of the screen before entering an infinite while loop.
Compiling the Kernel
The bochs emulator, as well as a physical PC machine, starts up in
16-bit mode. This means that our kernel must be a 16-bit program, as
opposed to a 32-bit or 64-bit program. The implication of writing a
16-bit program is that we cannot use the standard GNU gcc
C compiler because it generates 32- or 64-bit machine
language. Instead we will use the bcc compiler that
generates 16-bit machine language code. Unfortunately, bcc is fairly
primitive and requires that we use early C syntax.
The most significant aspect of
using bcc is that all local variables used in a function
must be defined before any statements in the function.
As an aside, modern 32-bit or 64-bit operating systems get around the fact that machines boot in 16-bit mode by using a secondary bootloader. The secondary bootloader is a 16-bit program that loads the 32- or 64-bit kernel into memory and then switches the machine into 32 or 64-bit mode before executing the kernel. Our OS will be a 16-bit OS so we will not have to worry about switching modes.
To compile your kernel use the command:
bcc -ansi -c -o kernel.o kernel.c
The -c flag tells the compiler not to use functions
from any pre-existing C libraries that might rely on system calls
(e.g. printf or putchar). The -ansi flag tells it to use
standard ANSI C syntax and the -o flag tells it to
produce an output file called kernel.o.
The kernel.o file is not your final machine code file,
however. Recall, that you are using the putInMemory function from the
kernel.asm file. For your C program to be able to
call putInMemory, you will also need to assemble
the kernel.asm file and then link it with
your kernel.o file.
To assemble the kernel.asm file use the command:
as86 kernel.asm -o kernel_asm.o
To link the kernel.o and kernel_asm.o
files into the executable kernel file use the command:
ld86 -o kernel -d kernel.o kernel_asm.o
The file kernel is your program in machine code. To
run it, you will need to copy it into the disk image at sector 3,
where the bootloader is expecting to find it (in later projects you
will find out why sector 3 and not sector 1). To copy the kernel file
to sector 3, use the command:
dd if=kernel of=floppya.img bs=512 conv=notrunc seek=3

Now, if you run bochs, the bootloader will load your
kernel from sector 3 and execute it. If your kernel program is
correct, you will see "Hello" printed in the top left corner of the
screen.
Common Issue
Sometimes floppya.img gets corrupted from mistakes
you make. If that's the case, restart: zero it out, then add the
bootload program at sector 0, then add the kernel at sector 3. You
could put all of these steps in the buid.sh (see next step).
Running the Kernel: Shell Scripts & Makefiles
Producing a final bootable floppy disk image requires you to type quite a few commands. Instead of typing them all each time we change the kernel, create bash scripts and/or create a Makefile for this step.
Bash Script
Create two bash scripts, one called build.sh that
builds the OS and the image on the floppy and one
called run.sh that runs the emulator. Make the scripts
executable. Your build script should not continue if compilation
fails.
If you put the correct commands into your shell script, running
build.sh will compile your kernel, link it with the
putInMemory function, and produce a new bootable disk
image.
Makefile
If using a Makefile, create a build.sh script that
runs the proper target and create a run.sh script that
runs the emulator. Make the scripts executable.
This is a good time to do a commit, if you haven't already, AND push your code to GitHub. Remember that you should only commit source files and scripts, not any of the generated files. The commit message will be written in atom (unless you changed the editor). If in atom, write your comment, save the file, and close the file.
Step 3. Kernel Improvements
- Implement a function
putCharinkernel.cthat displays a character in a specified color at a specified location on the screen. TheputCharfunction should accept as parameters- the character to be printed
- the color in which to print it
- the row and column at which to print the character as decimal integers (not hexadecimal)
- Modify your
mainfunction so that, in addition to printing "Hello" in the upper left corner of the screen, it uses theputCharfunction to display "Hello World" in white on a red background at the center of the screen. The video memory's color codes are shown below. The background color goes in the high-order nibble of the byte for the color, while the foreground color goes in the low-order nibble of the byte. For example,0000 0001 = 0x01will produce blue text on a black background.0 0000 black 1 0001 blue 2 0010 green 3 0011 cyan 4 0100 red 5 0101 magenta 6 0110 brown 7 0111 light gray 8 1000 dark gray 9 1001 light blue A 1010 light green B 1011 light cyan C 1100 light red D 1101 light magenta E 1110 yellow F 1111 white
- Implement a function
putStrinkernel.cthat displays a string in a specified color at a specified location on the screen. TheputStrfunction should accept as parameters- the terminated string to be printed,
- the color in which to print it,
- the row and column at which to start printing the string as decimal integers (not hexadecimal)
Each successive character in the string should be printed one column to the right of the previous one.
- Demonstrate your function works: Modify
your
mainfunction so that it uses theputStrfunction to display "Hello World" in red on a white background in the lower right corner of the screen (this didn't show up in the screenshot) and your name in white in the top left. - If the end of a line is reached, the next character should
appear on the following line. No characters should be printed
past the end of the screen. Modify your
putStrfunction so that it correctly handles that a long string wraps on the screen.Demonstrate that
putStrcan handle that case.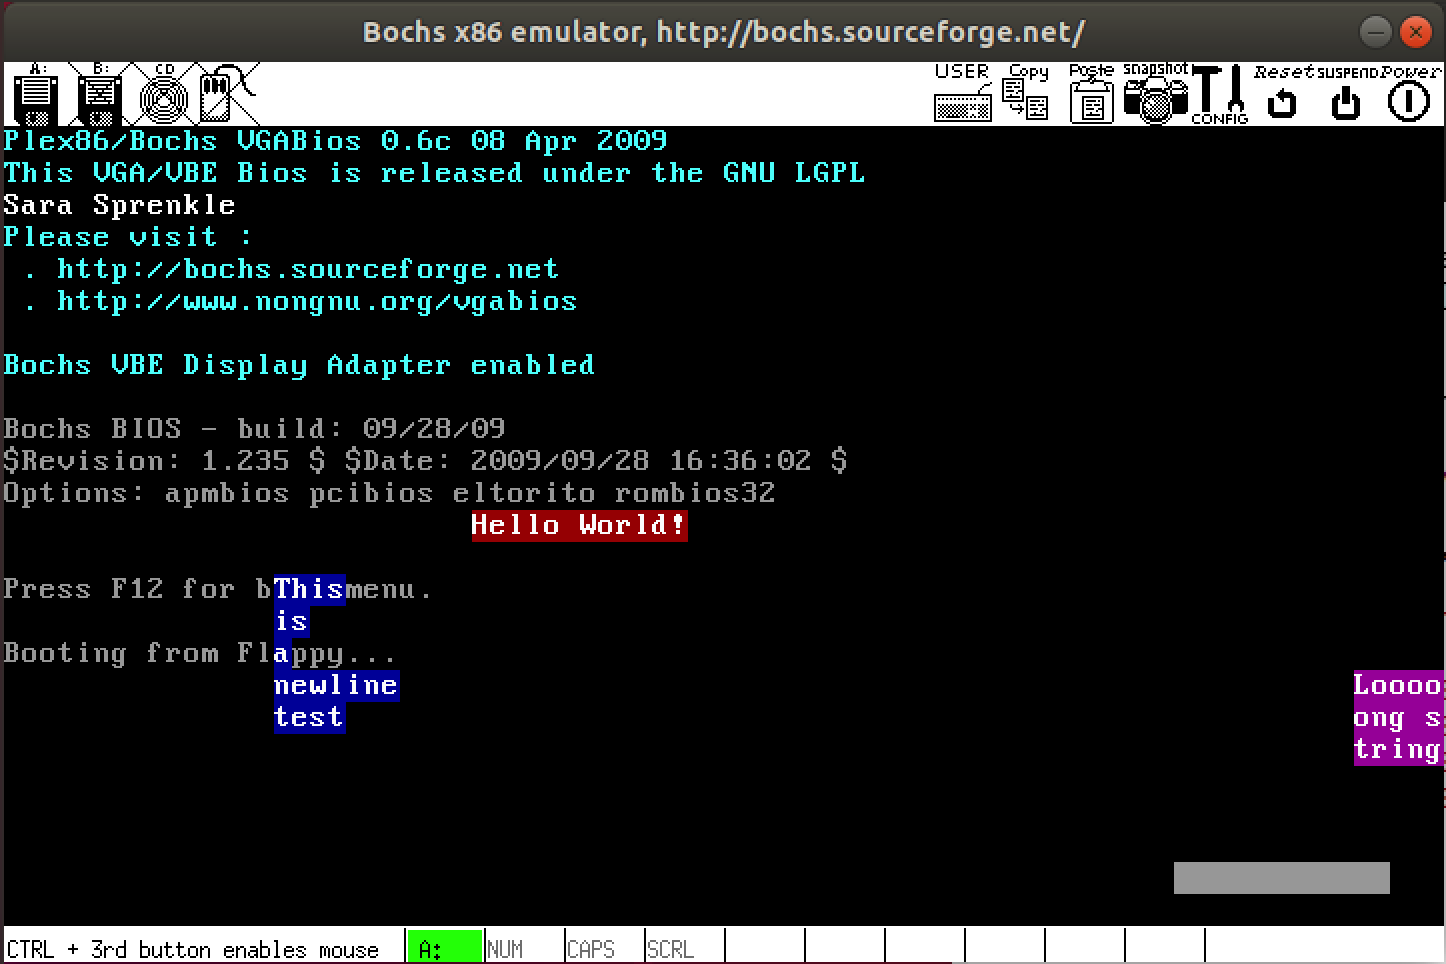
- What should happen when
putStrgets a newline (`\n') character? Does your current implementation do that? If not, update your function.Demonstrate that
putStrcan correctly handle that case.
Tips:
- When adding functions to your kernel, add prototypes at the top
of the file and then put your function definitions
after
main. You will see really odd behavior otherwise. Example of a prototype:
void putChar(char ch, int color, int row, int column); - You can iterate over every character until you see the end of the string, rather than needing to get the string's length (which can be error prone).
- Do put an infinite loop at the end of main.
Cleaning up your code
Great! You got it working! Before you submit, review your code. Are there any good places for constants (#define)? Is your code written in an (relatively) understandable way? Any extra code that you no longer need? Do you have appropriate comments? Do you explain the whys of what you're doing?
Checking your work
It is recommended that you [re?]clone your project in a new directory, and then make sure that you can build and execute your kernel. (This is, afterall, exactly the process that I'll use.)
Submission
GitHub Classroom will make a snapshot of your repository at the deadline. In addition to the originally supplied files, your repository should contain your source code (namely, kernel.c) and Bash scripts and, optionally, your Makefile. (Note that that does not include anything that was built or generated, like bootload or kernel or floppy.img.)
I should be able to pull your code and run build.sh
and then run.sh to see your kernel running.
Grading
Your project will be assessed on its correctness as well as its style. Your kernel.c file and bash scripts should be nicely formatted and well-documented.
- (50) Basic functionality: writing "Hello World"; build.sh and run.sh scripts
- (40) Kernel improvements
- (10) Code style: proper comments, format
Acknowledgement
This assignment as well as the accompanying files and source code have been adopted with minor adaptations from those developed by Michael Black at American University. His paper "Build an operating system from scratch: a project for an introductory operating systems course" can be found in the ACM Digital Library.