Goals
After the lab, you should know how to
- utilize built-in and imported functions in Python
- using an API to solve problems
- creating basic web pages to display images
Objective: Practice Using Linux
Set up for Lab 3
- Run runHelpClient & to get our handy tool running.
- Create a directory called
lab3in yourcs111directory. Your programs and the output for this lab will all be saved in thelab3directory. - Copy
graphics.pyin/csdept/courses/cs111/handouts/lab3/into yourlab3directory.
Objective: Programming in Python
We'll practice writing several Python programs, each in their own text file. Name the files lab3.1.py through lab3.7.py.
Your programs will be graded on correctness, style, and how well you tested them. Make sure you adhere to the good development and testing practices we discussed in class. Your code should be readable and your output should be useful and well-formatted.
After you've developed a correct solution to each program, restart IDLE or close and reopen the IDLE "shell" by running the program again (using F5), demonstrate that the program works using several good test cases, and save the output to a file named lab3.x.out, where x is the problem number.
- (13 pts) Write a program that sums all the odd integers between 0 and 100 and prints the total using a loop. Define a constant to stop your loop.
- (12 pts) Write a program that calculates the area of a circle.
Get the radius of the circle as input from the user. Use the most
precise value of π available to you, i.e., use the
constant
pidefined in themathmodule. Select a "reasonable" number of digits for precision in the result you display to the user. - (15 pts) It's getting close to the Super Bowl. Your task is to
write a program that predicts the final score of the game. We want
to make the program easy to change, based on who is in the Super
Bowl, so define constants for the names of the two teams. The
American Football Conference team is the New England Patriots and
the National Football Conference team is the Atlanta Falcons.
You're going to randomly generate the scores, assuming a minimum
score of 0 points and a maximum score of 60 points. (We're ignoring
that not all scores are possible.) Run 10 simulations.
Sample output:
Super Bowl simulations: Simulation 1 : Patriots 7 , Falcons 3 Simulation 2 : Patriots 27 , Falcons 13 Simulation 3 : Patriots 53 , Falcons 33 Simulation 4 : Patriots 47 , Falcons 23 Simulation 5 : Patriots 17 , Falcons 44 Simulation 6 : Patriots 12 , Falcons 16 Simulation 7 : Patriots 25 , Falcons 22 Simulation 8 : Patriots 33 , Falcons 43 Simulation 9 : Patriots 45 , Falcons 56 Simulation 10 : Patriots 55 , Falcons 21 - (10) Using the
graphicsmodule, draw a yellow circle with radius 30 and a red square with a side length of 50 in a window that is 400x200 with the name "Practice". Position the circle in the upper-left quadrant of the canvas and the square in the lower-right quadrant. At the end of the program, wait for a user's mouse click and then close the window. You do not need to save IDLE output for this program. - (10) Using the
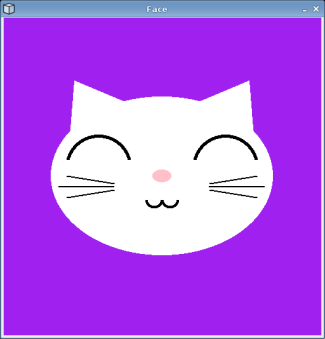
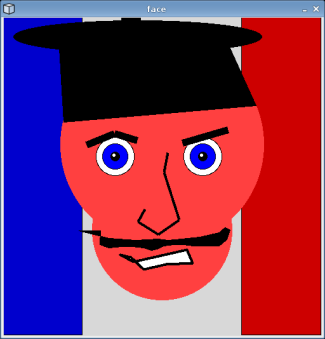
graphicsmodule, draw the beginning of a snow-person. Create a canvas with the title "Snow Person". Draw a white circle of radius 50. Clone the circle and move the cloned circle above the first circle (so that the circle appears to be sitting on top of the original circle). Repeat with a third cloned circle. Draw two black, filled-in circles for eyes in the top circle. Note that you should draw one eye, thenclonethe eye and move it to the appropriate place. At the end of the program, wait for a user's mouse click and then close the window. You do not need to save IDLE output for this program. - (20) Create a program that draws "something significant", such
as a scene, a house, or a face, using the graphics library. Here
are some guidelines to follow:
- Your program should keep the drawn face/house/scene on the graphics window until the user clicks the mouse. Then the graphics window should close and your program should end.
- Use a variety of colors and several different types of shapes.
- For symmetrical features (such as eyes or ears), remember to
use the
clonemethod to make a copy of the original shape. Then draw the cloned shape in the window and move it to the desired location. - You may want to use the
setCoordsmethod of theGraphWinobject to adjust the coordinates of the window. (See the reference above for more information aboutsetCoords.)
Screen Capture:
- To save the image you created, in the terminal, open the
program
xv, using the commandxv &. - Right click on the window with the fishes that pops up.
- You should get an "xv controls" window that looks like:
- Click the "Grab" option.
- You should get a window that describes how to use "Grab".
- Make sure no other windows are covering your image window. Click "Grab" and then use the left mouse button to click on the window that your image is displayed in. Your best bet is probably to click in the "header" at the top of the image.
- You should get another "copy" of your window, but this time, the window is actually an image and its label reads something about "xv".
- Back in the "xv controls" window, click "Save". You should get an
"xv save" window that looks something like this:
- In the "Save file:" box at the bottom of the screen, give the image an appropriate name, with a ".gif" extension (if that's the format you selected for the file). Then click "OK".
You've saved the image!
Some previously created images to inspire you:
- (10) Add some sort of animation to the picture you created above.
For example, you could make an entire face move around the window or
you could have a feature of a face move (such as a blinking eye).
Note: this is not simply the click and move we did before we
did animation. You can allow a user to click to move things,
but you must
animate that movement.
If you want to animate a group of objects, moving together, you can use the
GraphObjectGroupclass. There is an example of using theGraphObjectGroupclass in theexample.pyfile in the/csdept/courses/cs111/handouts/lab3directory. The example code may not make sense yet, but just follow the example and ask questions.
Reference Material for Graphics Programming
Objective: Creating a New Web Page
It's time to revisit our web pages. (You knew we'd get back to this sooner or later!) Note that there are links in the directions for more info.
- Go into your
public_htmldirectory. - Copy your
index.htmlfile into a file calledlab3.html, still in thepublic_htmldirectory (i.e., not in a new directory) - Copy the screen capture image from your lab into
your
public_htmldirectory. - Open
lab3.htmlin jEdit. - Modify the Lab 3 web page to have an appropriate title, header, and information about the image you created during this lab.
- View your web page in the browser. Recall the URL for this page. You may want to review Lab 0.
- Modify your Lab 3 web page to display the image you created.
- Clean up your Lab 3 page so that it only contains the image, a link to your home page, and any appropriate text. (In other words, get rid of the stuff that should only be on your index.html page.)
- Modify your index.html page to link to your Lab 3 web page.
- Verify your web pages look correct in the browser. Make sure that the URL in the location bar starts with "http://" and not "file://" to verify that anyone on the Web can view your web pages.
Finishing up: What to turn in for this lab
Review the Unix commands for submitting your lab.
- Copy your
lab3directory into theturnindirectory. If you have every thing set up correctly, you can do this by running turnin.sh lab3 - Clean up: jEdit makes backup files and appends "~" to the name of your file. Delete any "~" files from your lab directory.
- Before printing, move
graphics.pyout of yourcs111/lab3directory; otherwise, the print out will be too long. (Check out themvcommand.) You can move that file back into yourlab3directory after you've printed. Also, if you saved your image in this directory, put it in yourpublic_htmldirectory and/or delete it from this directory. If you have a filegraphics.pyc, you should delete that file before printing. In other words, you should only have the .py files you wrote and the .out files you created and possibly a__pycache__directory in your directory when you print. - Create your printed lab assignment, using the
createPrintableLabcommand:
createPrintableLab <labdirname>Again, you should probably print from the
cs111directory.If you see a message about an "unescaped sequence", that probably means you still have an image in the
lab3directory. Remove the image from the directory and repeat this step. - View your file using the
evincecommand. - Print the file using
the
lprcommand.
Labs are due at the beginning of Friday's class. You should hand
in the printed copy at the beginning of class, and the electronic
version should be in the turnin
directory before class on Friday.
Ask well before the deadline if you need help turning in your assignment!
Grading (100 pts)
- Python programs: 90 pts; see above for breakdown
- Web pages: 10 pts (both your index.html page and the lab3.html page.)